Documentation
Sponzy - Support Creators Content Script
Created: 03, September 2020 by Miguel Vasquez
Last update 08, January 2026Table of Contents
Sponzy - Support Creators Content Script is a platform where content creators, writers, designers, developers, photographers or any other branch can monetize their content by receiving subscriptions from their most loyal followers or just anyone who likes their work. They can create free and premium posts for their subscribers.
Requirements:
- PHP 8.2 or Greater
- MySQL 5.7 or Mariadb 10.3.17
- Ctype PHP Extension
- cURL PHP Extension
- DOM PHP Extension
- Fileinfo PHP Extension
- Filter PHP Extension
- Hash PHP Extension
- Mbstring PHP Extension
- OpenSSL PHP Extension
- PCRE PHP Extension
- PDO PHP Extension
- Session PHP Extension
- Tokenizer PHP Extension
- XML PHP Extension
- GD or Imagick
- EXIF
- allow_url_fopen (PHP.INI) is ON
- FFMPEG
IMPORTANT:
Make sure your server has PHP 8.2 or higher and MySQL 5.7 or Mariadb 10.3.17 as a minimum
IMPORTANT:
if you are running Nginx, please follow these instructions Nginx Configuration
Basic PHP configuration
max_execution_time minimum 12000memory_limit set to 900Mpost_max_size set the maximum upload value you wantupload_max_filesize must be the same maximum value of post_max_sizeSetting MySQL
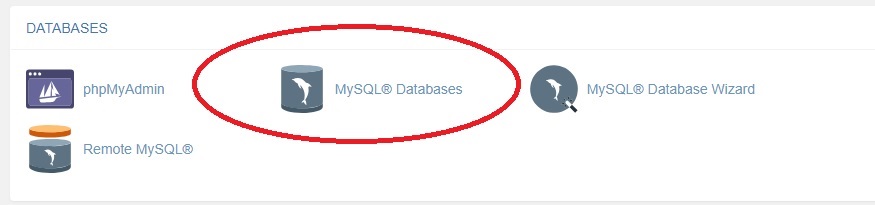
- 1.) Create a database
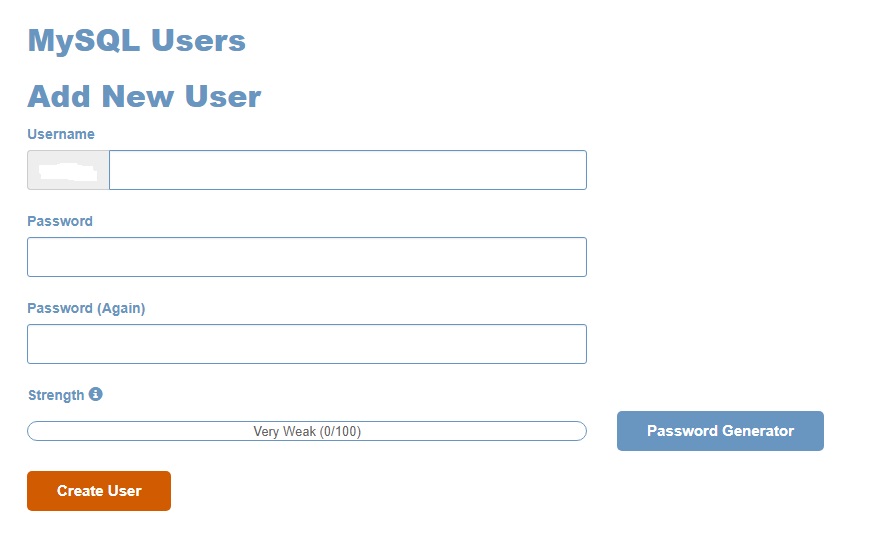
- 2.) Create a user for database
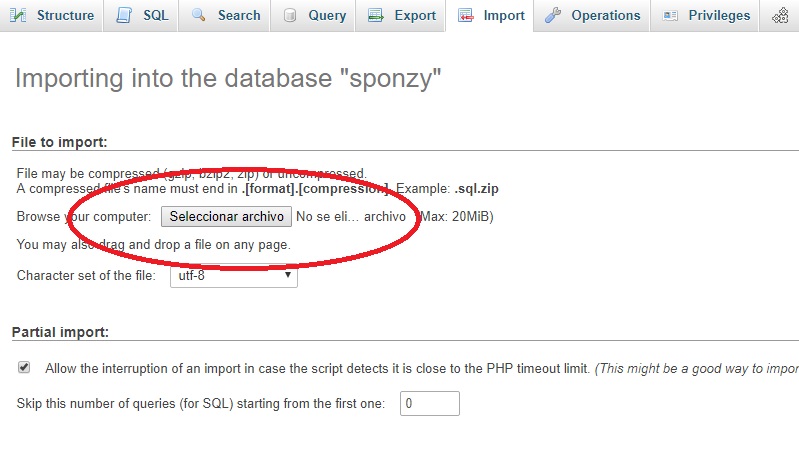
- 3.) Import the Database
- Log into your phpMyAdmin and import the
sponzy.sqlfile located in the folderMySQL
Uploading Files
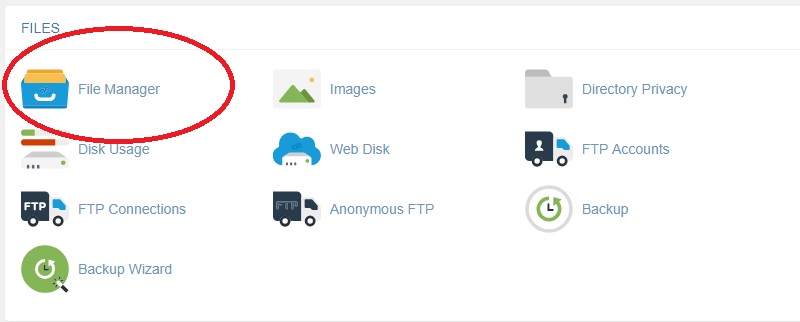
- Upload all files inside the folder
"Script"to the"public_html"or"www"folder on your server. You can compress the files or use FTP.
Installation
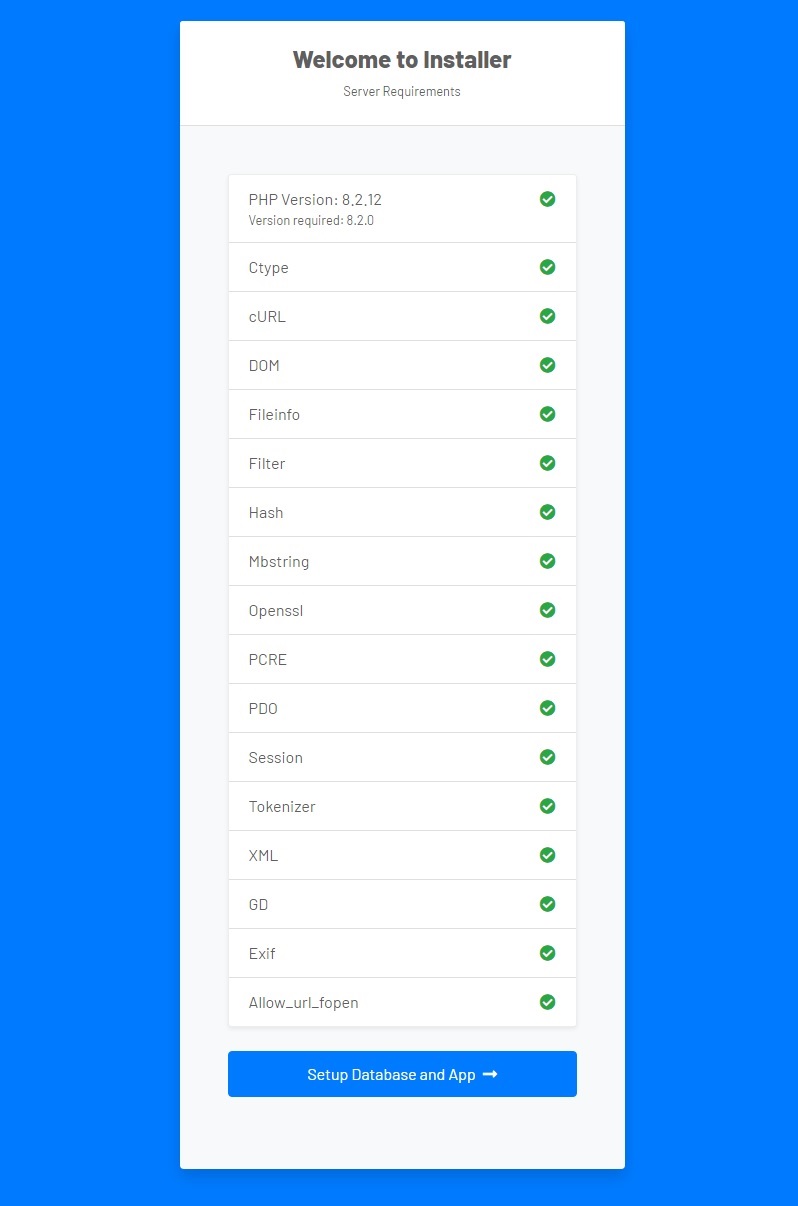
- After you have uploaded all files, go to
https://yousite.com/install/script - This screen will appear, all the boxes must be green to proceed with the installation.
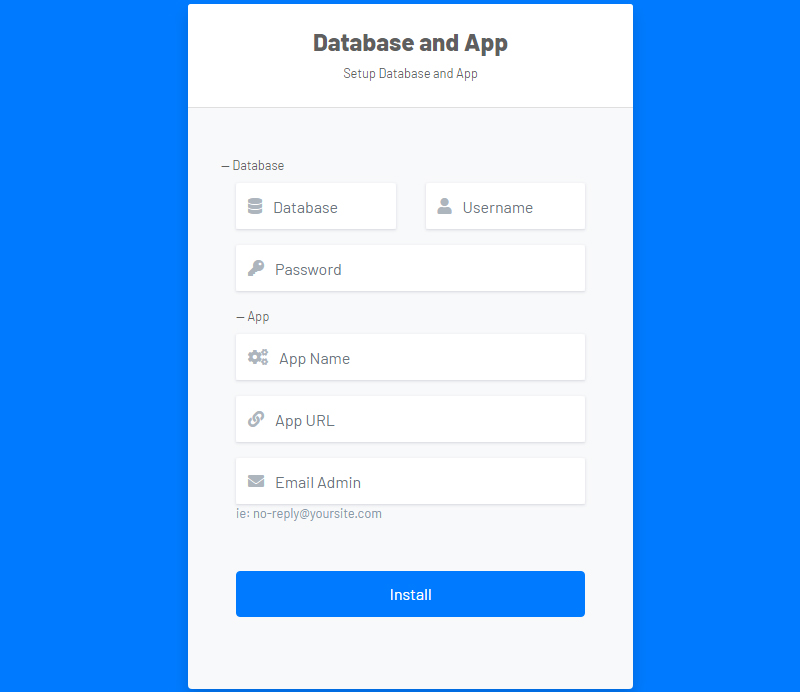
- Next, you can put the credentials of your database, your App name, URL and an email. You will be redirected to the Panel Admin after the installation has finished.
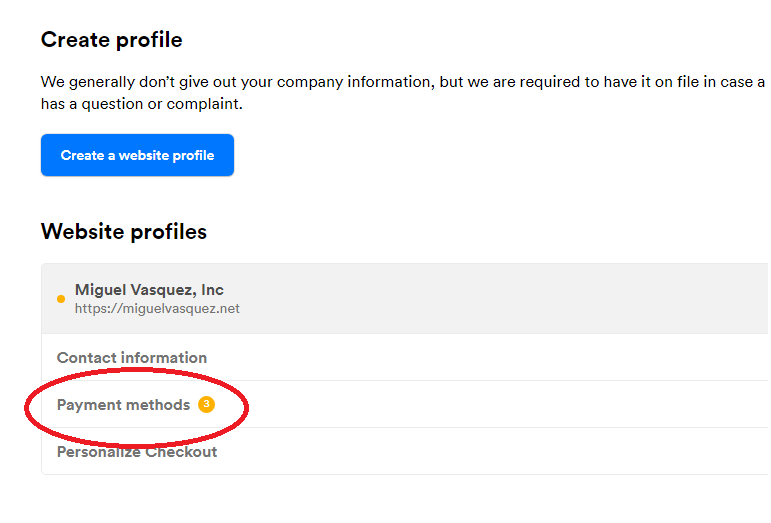
- Credentials Admin Panel
- Just enter from
https://yousite.com/loginand enter the following credentials.
User: Admin
Pass: 123456
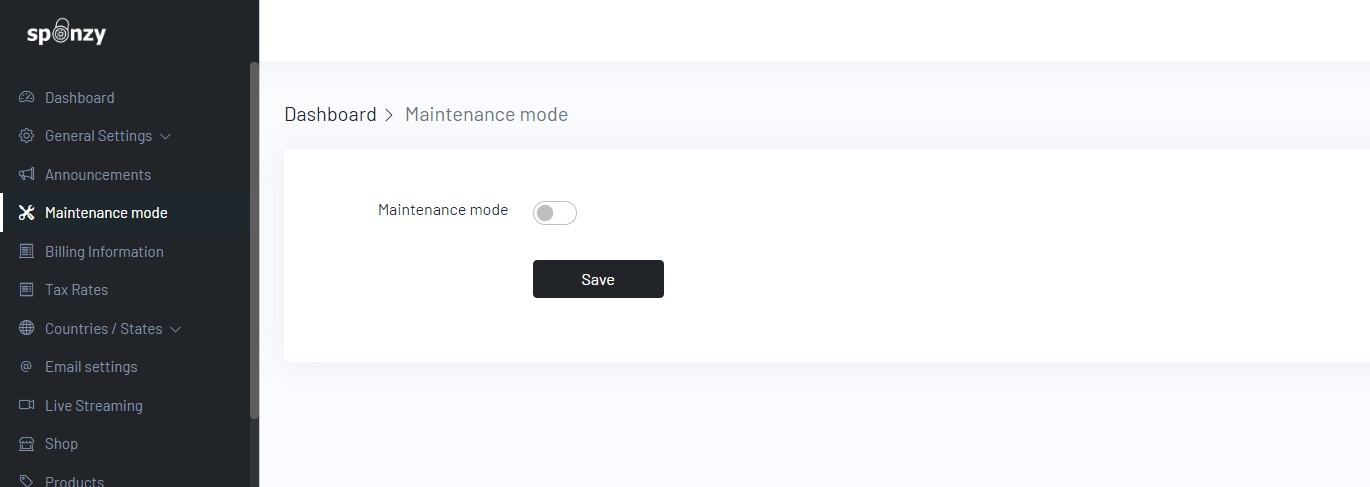
storage \ framework and delete the file named down and file maintenance.php go back to panel / admin / maintenance / mode put "off" and then "on" again, whenever you want to have your site in mode maintenance.
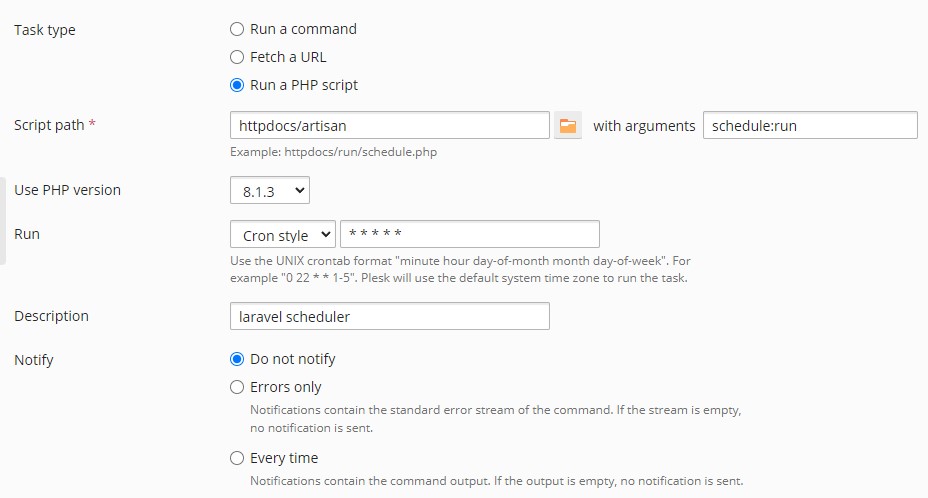
IMPORTANT: It is very important to create a Cron Job so that automatic renewals with the wallet work, sending emails in queue, video encoding with FFMPEG works among other things.
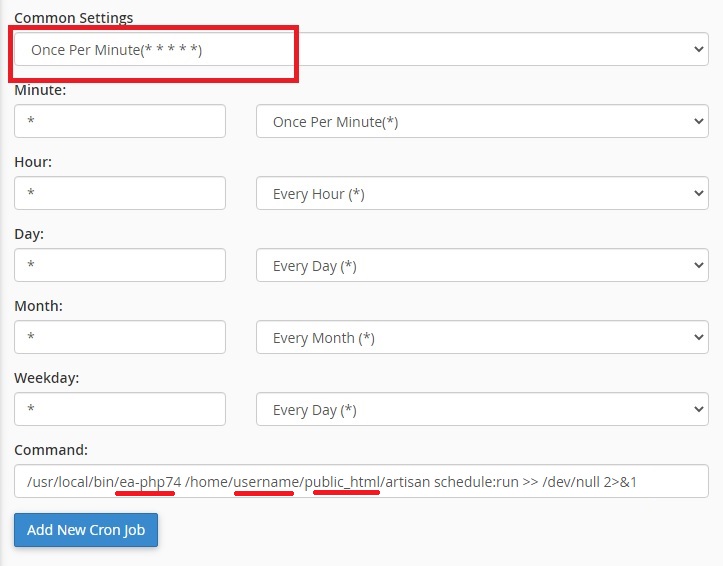
/usr/local/bin/ea-php81 /home/username/public_html/artisan schedule:run >> /dev/null 2>&1/usr/local/bin/ea-php81 /home/username/yourwebsite.com/artisan schedule:run >> /dev/null 2>&1Important: if it doesn't work with /usr/local/bin/ea-php81 or whatever PHP version you have try /usr/local/bin/php
https://yousite.com/panel/admin/settings/emailhttps://yousite.com/panel/admin/storageImportant: If you want to migrate your site to any storage service (Amazon, DigtalOcean or Wasabi), you must upload the following folder located in the public / uploads of your current site.
Important: If your site is new you should upload the folder located in the public / uploads
https://yousite.com/panel/admin/google
IMPORTANT:
choose reCAPTCHA v2 and Invisible reCAPTCHA
Developers section of the Stripe dashboard and click on Webhooks.
Click on Add endpoint
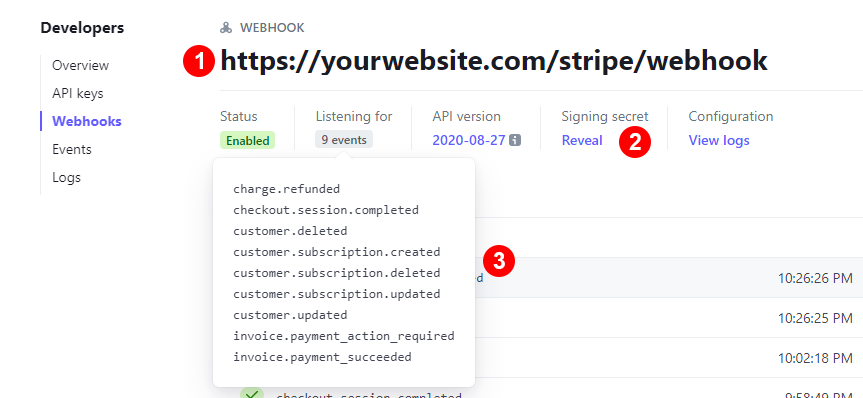
stripe/webhookSigning secret to reveal the Stripe Webhook Secret that you must place in Dashboard > Payment Settings > Stripe2025-05-28
Client ID and Secret in Panel Admin > Payments Settings > PayPal.Webhook URL field paste your webhook URL https://yourwebsite.com/webhook/paypalWebhook ID in Panel Admin > Payments Settings > PayPalDYNAMIC PRICES on your CCBill account - contact their live support https://support.ccbill.com
Creating a FlexForm

Allow for dynamic price to be passed to form box and click save.

Panel Admin > Payment Settings > CCBill
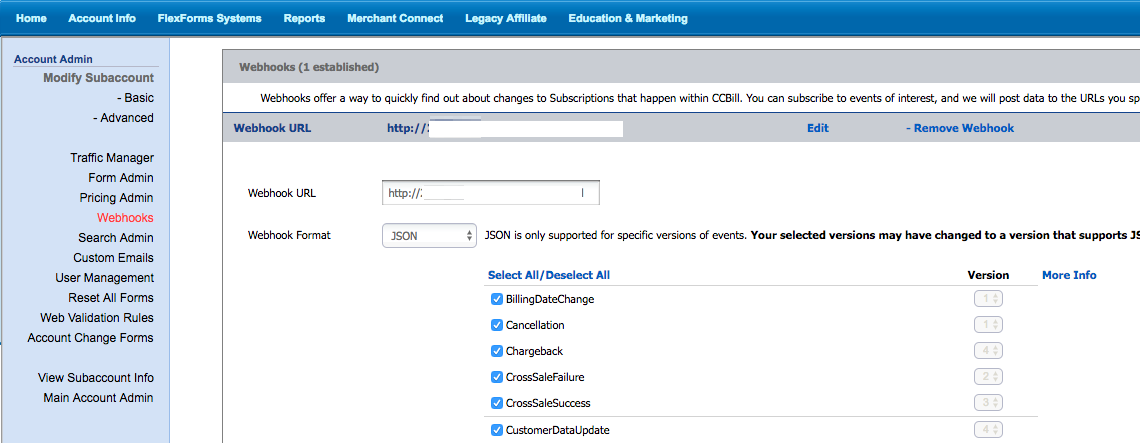
Sub Account
Setup Webhooks
Webhook URL text box with the URL https://yourwebsite.com/webhook/ccbill
Webhook format select URL Encoded
Select All and click on update.
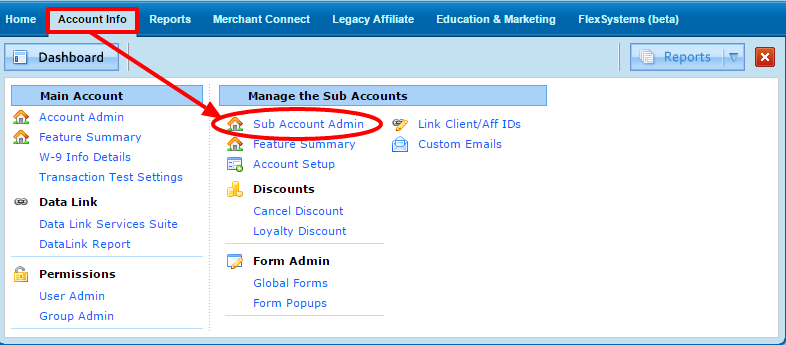
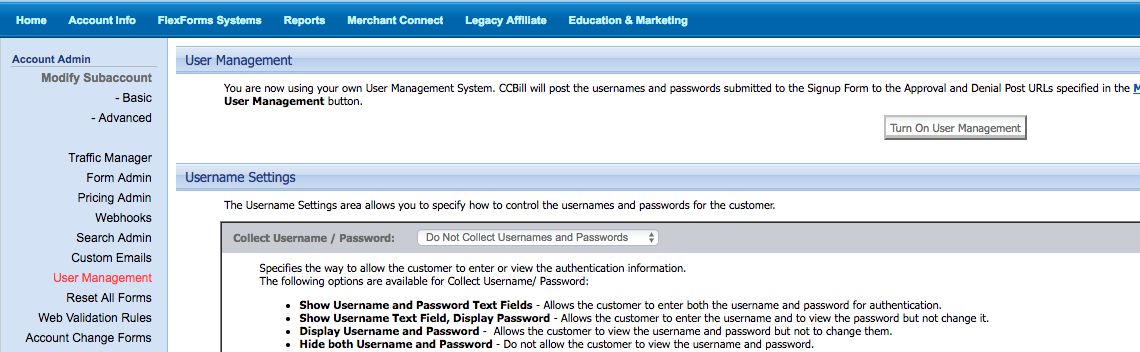
Disabling User Management
- On the Account Info megamenu, click Sub Account Admin, then User Management.
- Select Turn off User Management in the top section.
-
Select
Do Not Collect Usernames and Passwordsin theUsername Settingssection.
Create Library of URL (Approval)
2. URL Name. Enter a meaningful name for this URL. Forexample: Payment Success
3. URL. Under URL, enter the base URL for your Site store.
https://yourwebsite.com/ccbill/approved
2. Under the green Approve arrow, click the square to modify the action.
3. Approval URL. In the left menu, select A URL. Select Select a Saved URL and select the URL your created earlier (e.g. Payment Success).
4. Redirect Time. Select a redirect time of 1 second using the slider at the bottom and save the form. (e.g. 4 seconds)
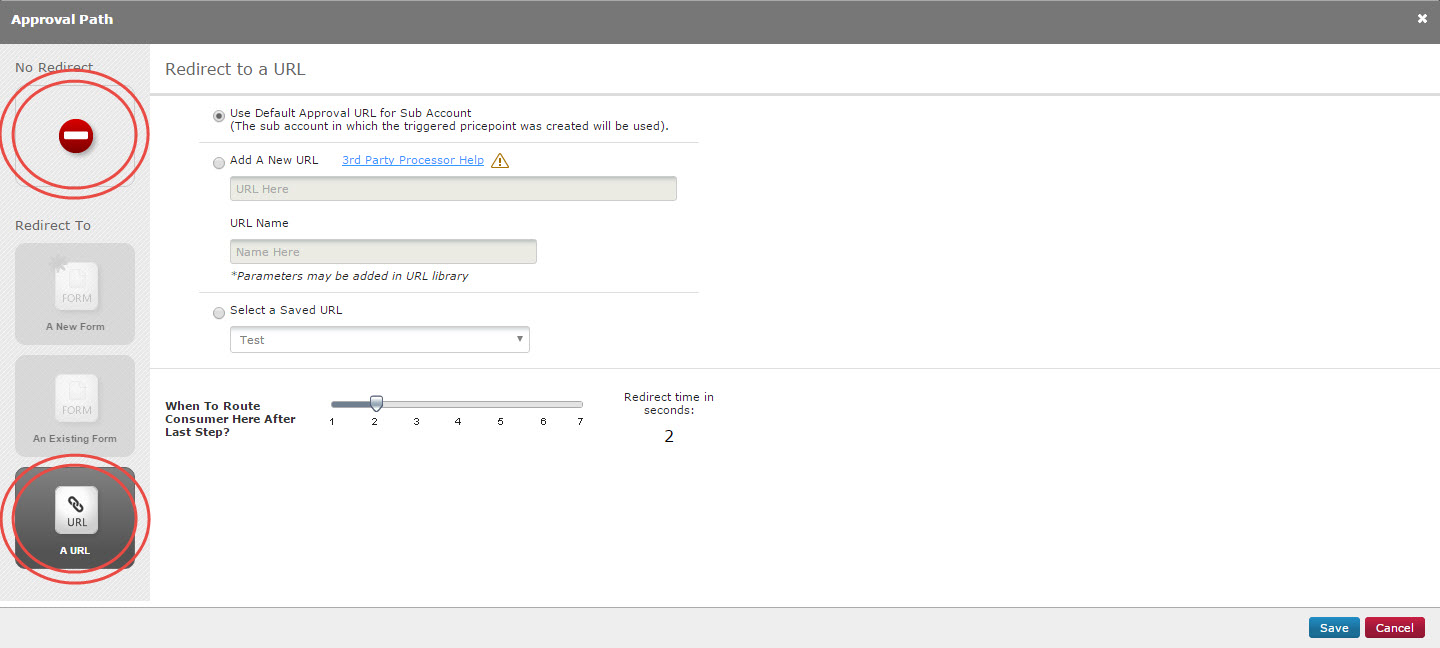
If you have any problems or questions contact CCBill support https://support.ccbill.com
Panel Admin > Payment Settings > PaystackCallback URLWebhook URL put https://yourwebsite.com/webhook/paystack
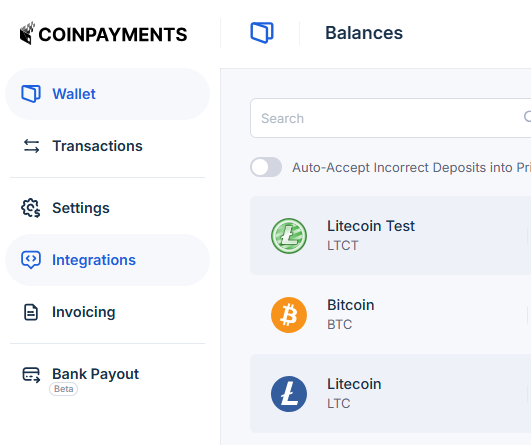
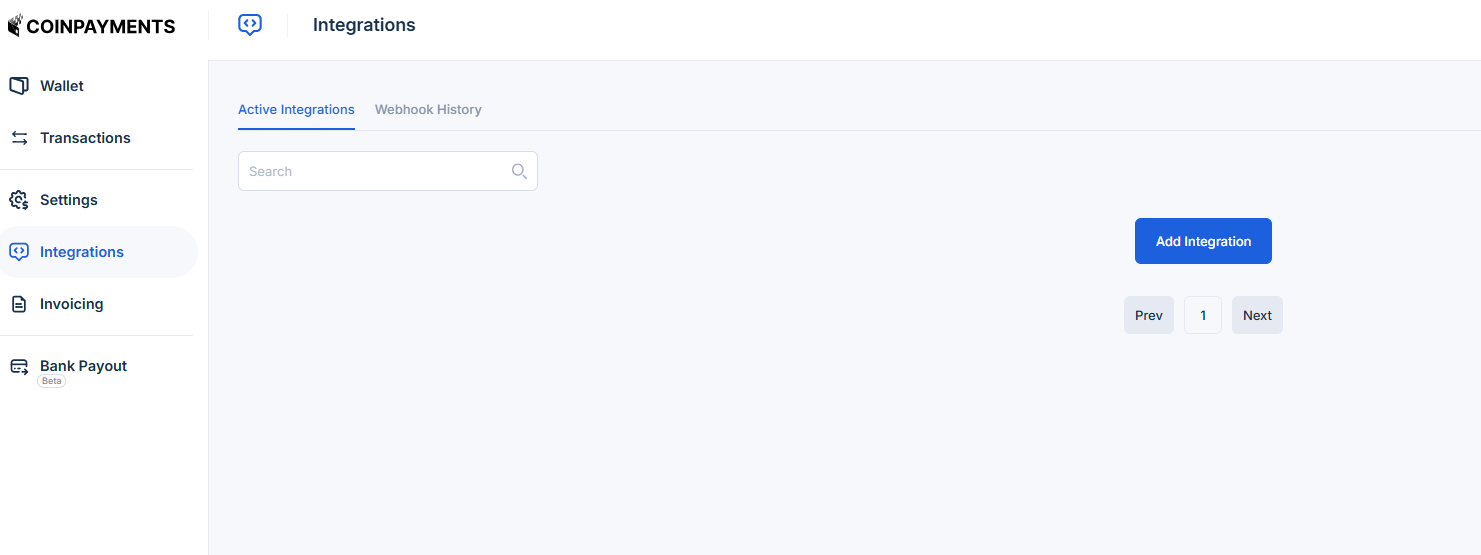
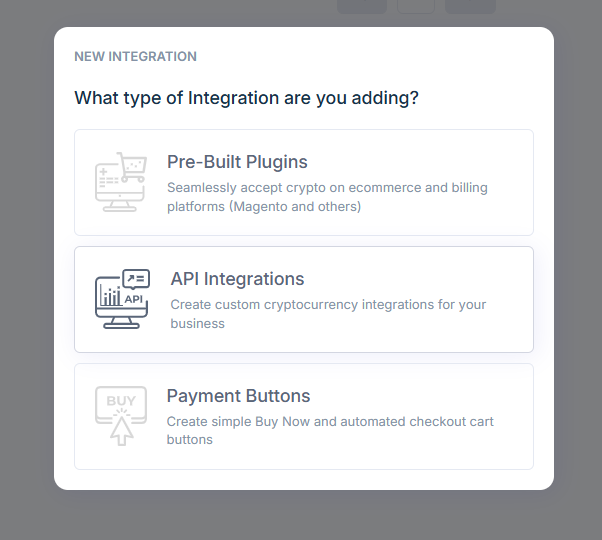
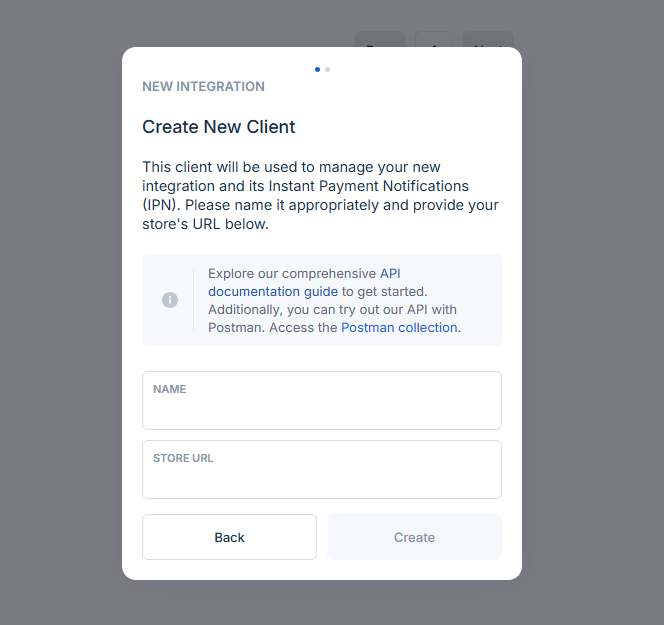
Panel Admin > Payment Settings > Coinpayments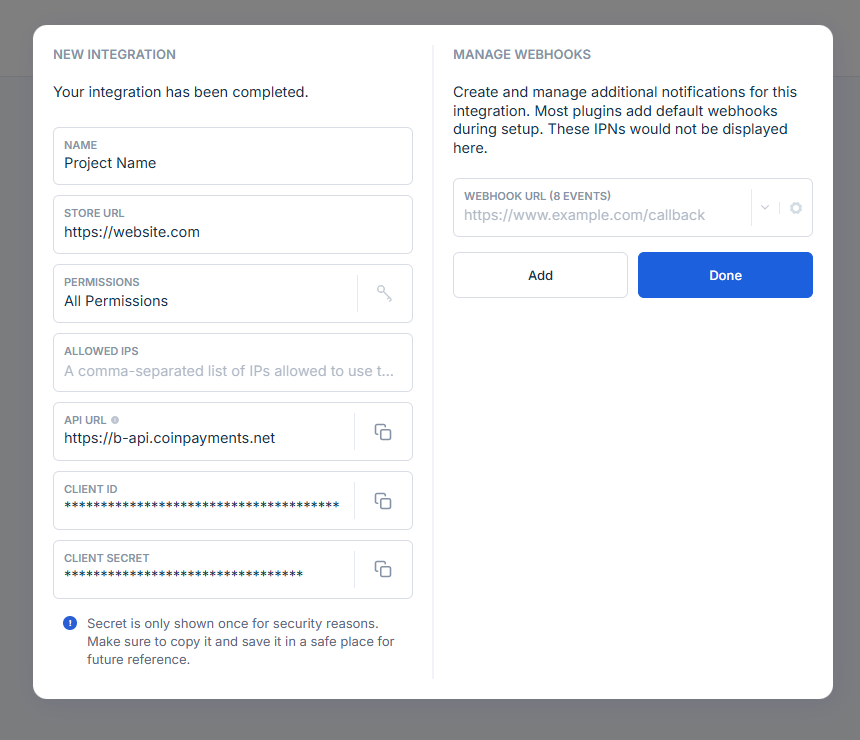

- What type of payment solution are you integrating? choose
Online Payments - Are you using an e-commerce platform? choose
No - What product are you integrating? choose
CheckoutPro - Integration model
Leave blank
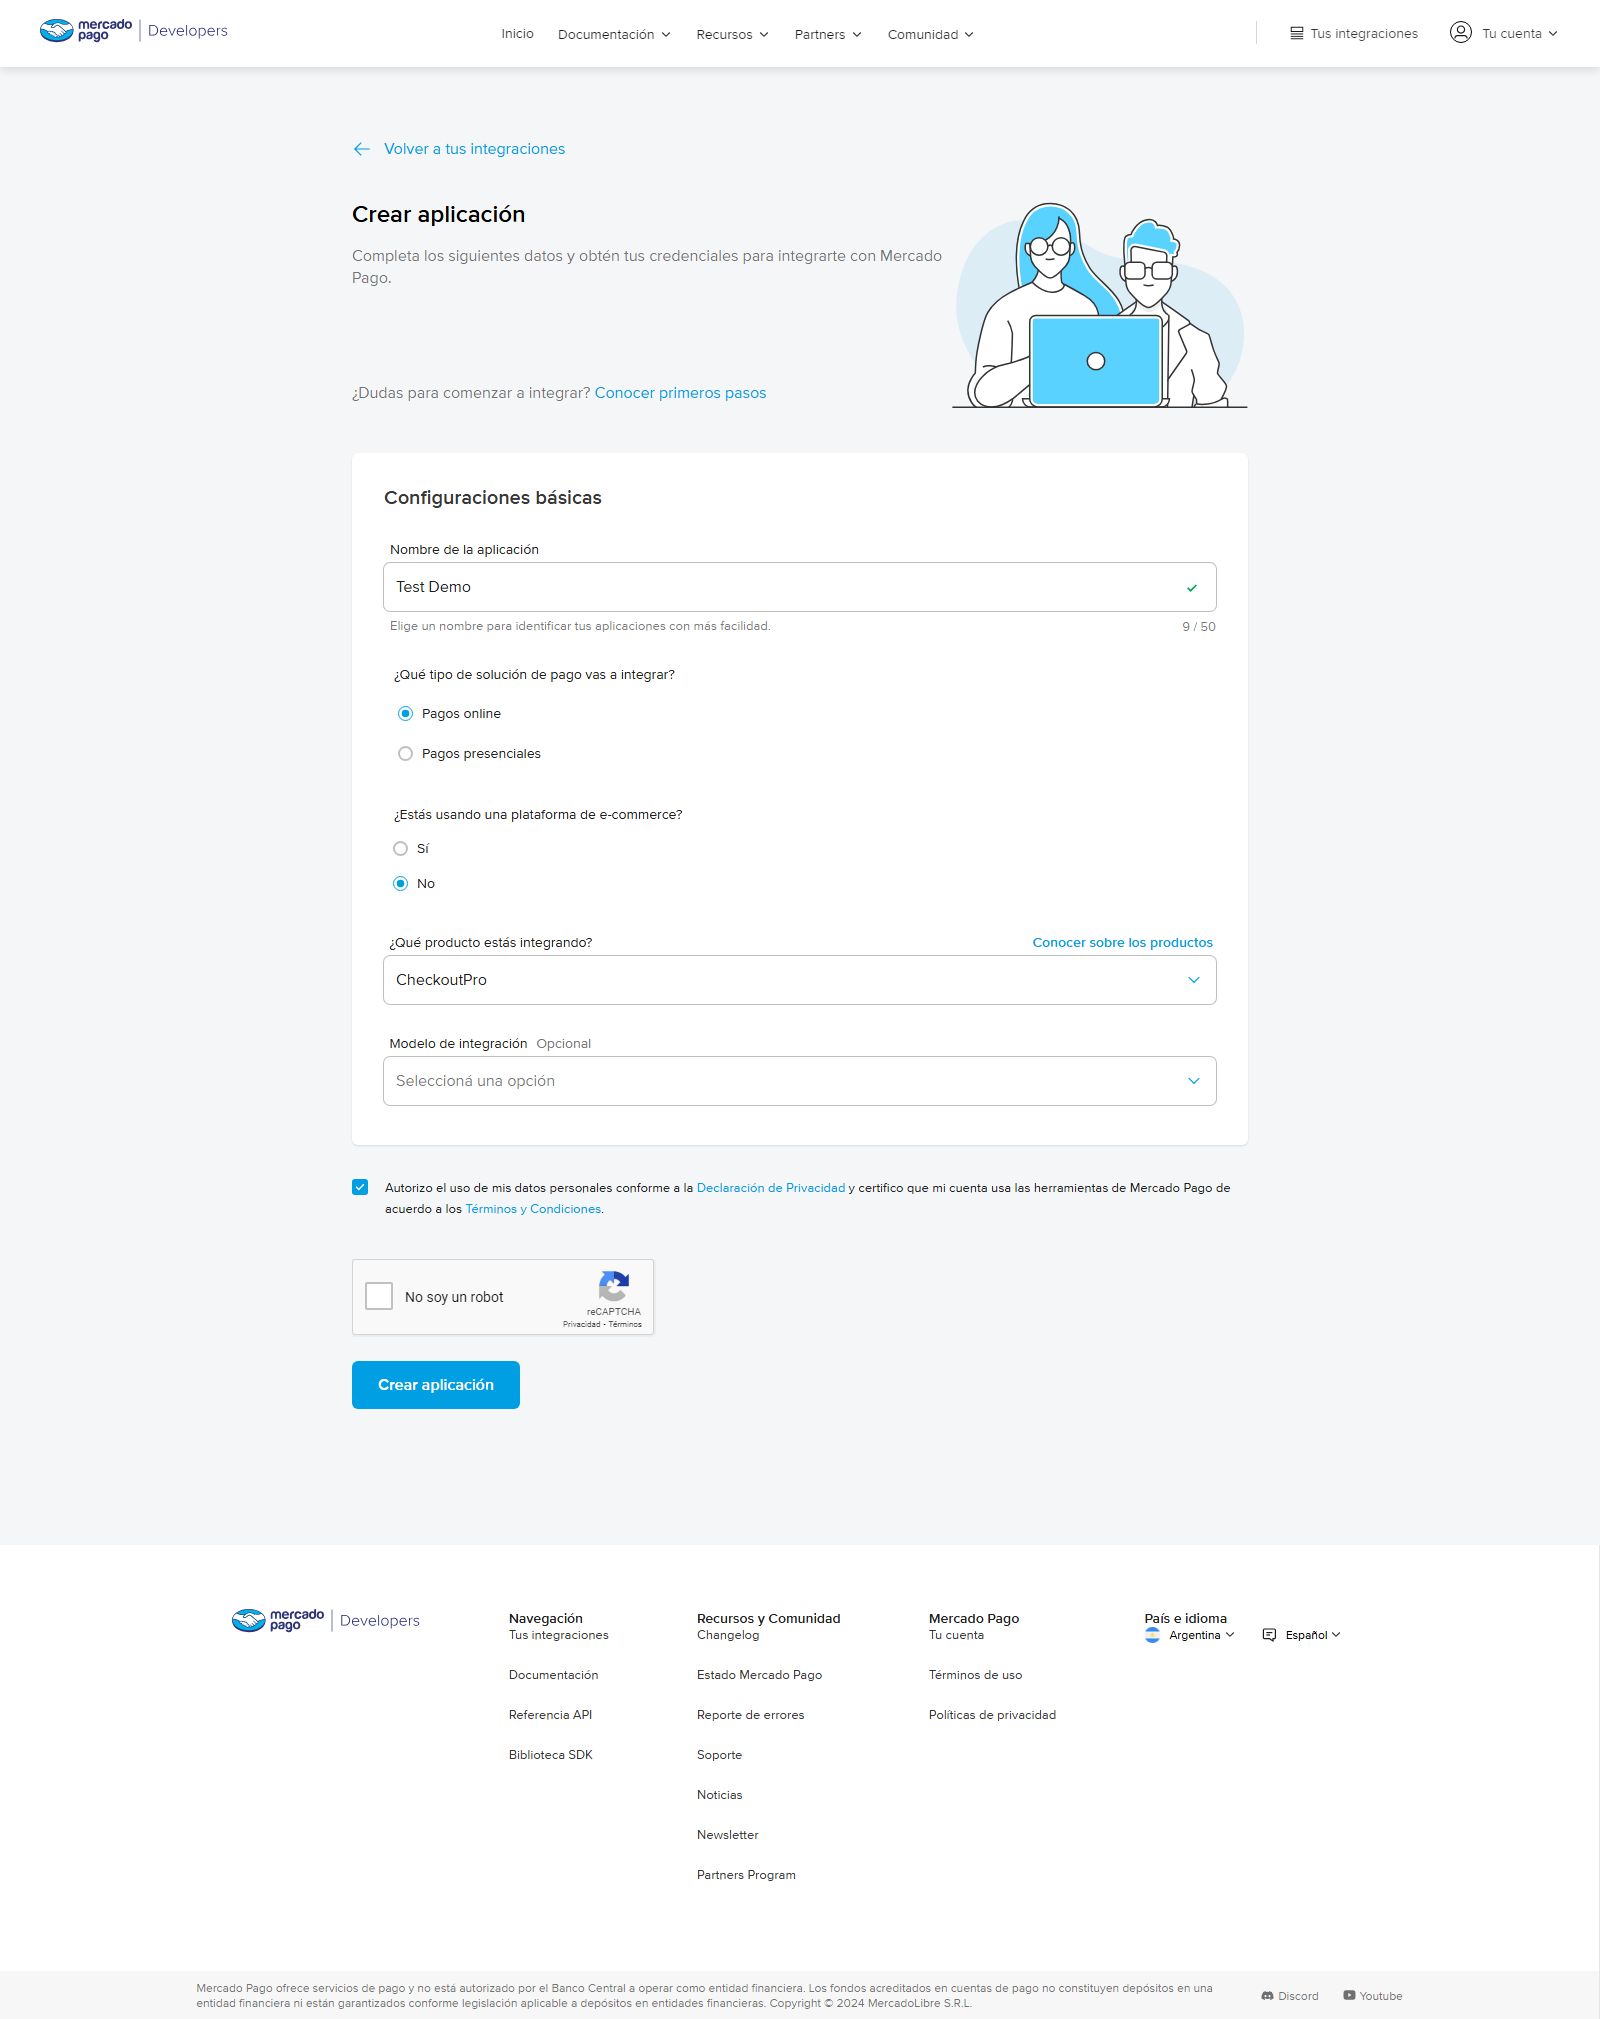
Access Token from Production credentials
Access Token to Panel Admin > Payment Settings > Mercadopago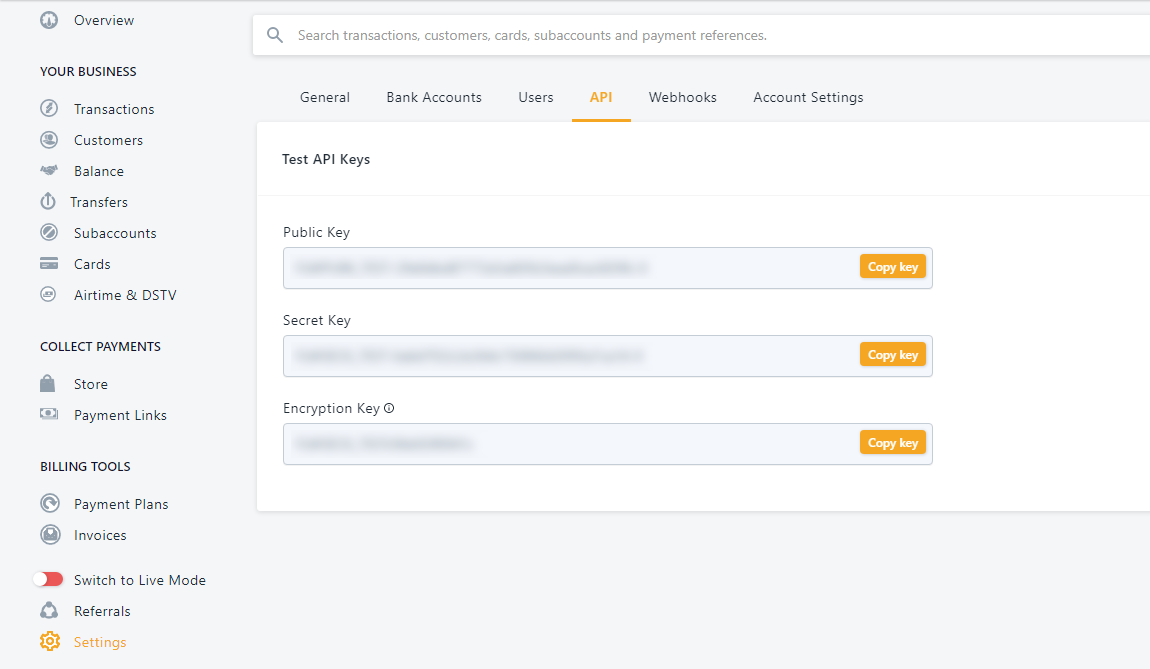
Panel Admin > Payment Settings > Flutterwave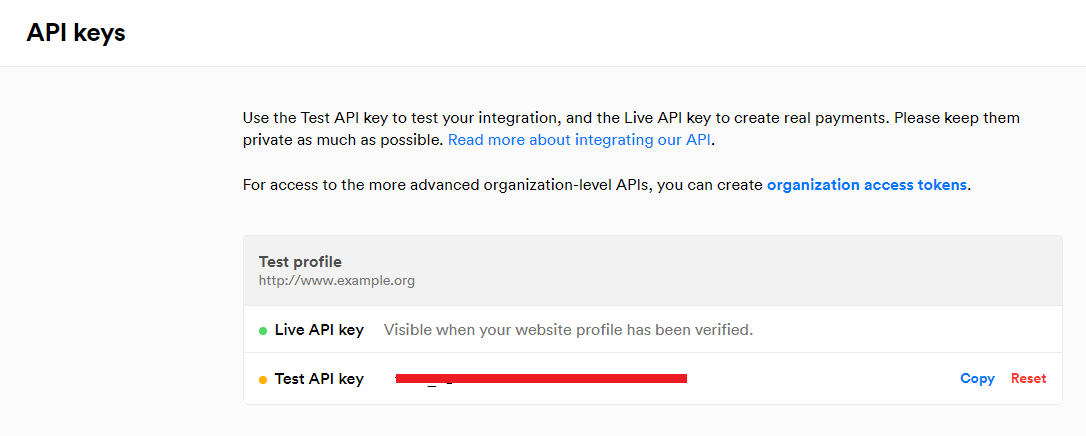
settings and then Payment methods
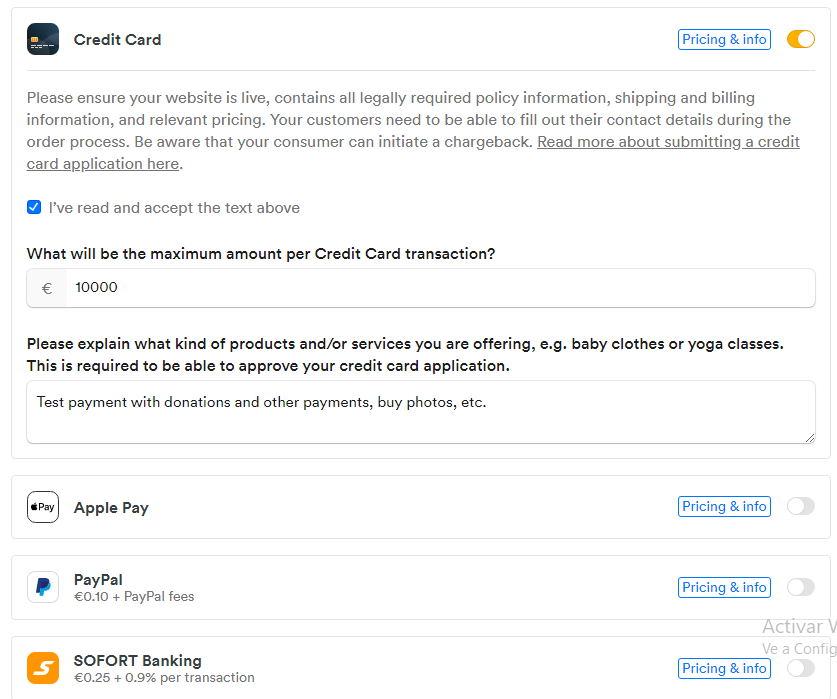
IMPORTANT:
This step is essential, not doing it will not work.
Panel Admin > Payment Settings > MolliePanel Admin > Payment Settings > RazorpayPanel Admin > Payment Settings > Coinbasehttps://yourwebsite.com/webhook/coinbasePanel Admin > Payment Settings > CoinbasePanel Admin > Payment Settings > NowPayments.IPN secret key>Panel Admin > Payment Settings > NowPaymentsPanel Admin > Payment Settings > BinancePanel Admin > Payment Settings > OpenPixPanel Admin > Payment Settings > Atlos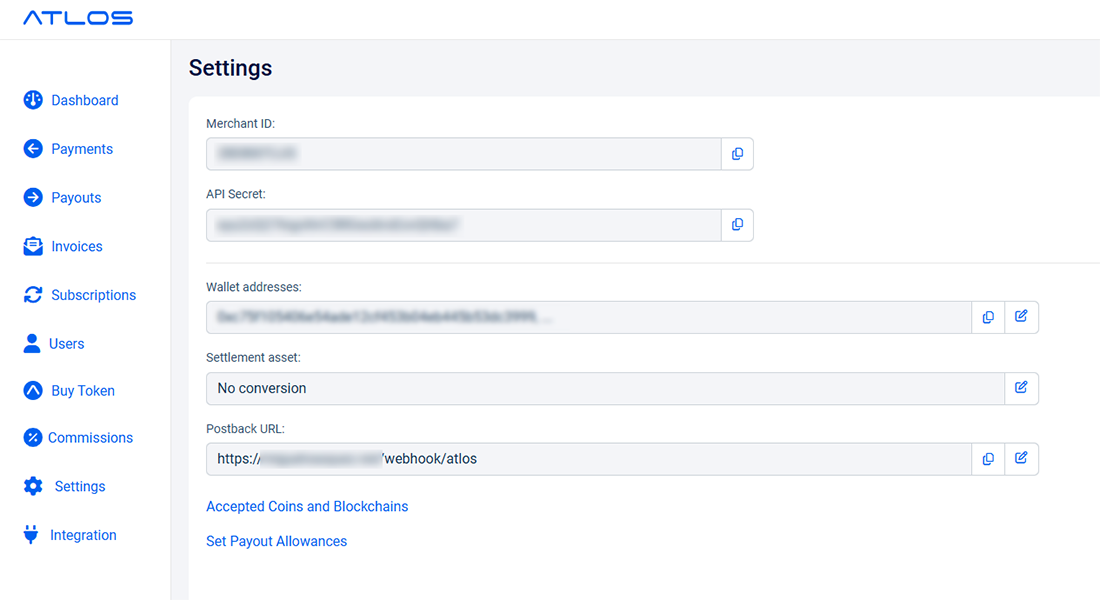
Social Login
- Go to
https://yousite.com/panel/admin/social-login
Live Streaming / Video and Audio Calls (Agora.io)
IMPORTANT:
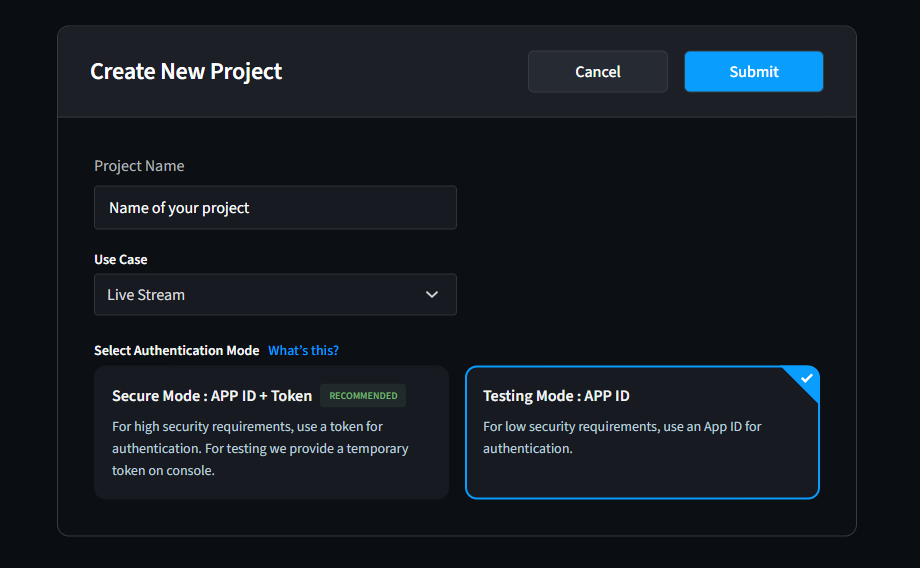
Do not use the app that is initially created when you create the Agora account, create a new app to make it work correctly.
- Get yourself account Agora.io
- Go to https://console.agora.io/project-management and Click on Create New and next Configure as shown in the following image
- In Use Case select Live Stream
- Go to Panel Admin > Live Streaming or Panel Admin > Video Calls enable and set the APP ID
Age Verification
- Yoti Service
- Get yourself Yoti account
- Guide get API keys https://developers.yoti.com/age-verification/production-keys
- Copy the API keys to
Panel Admin > Age verification - Didit Service
- Get yourself Didit account
- Get API keys on API & Webhooks section
- Get Worflow ID from Workflows section
- Copy the API keys and workflow ID to
Panel Admin > Age verification
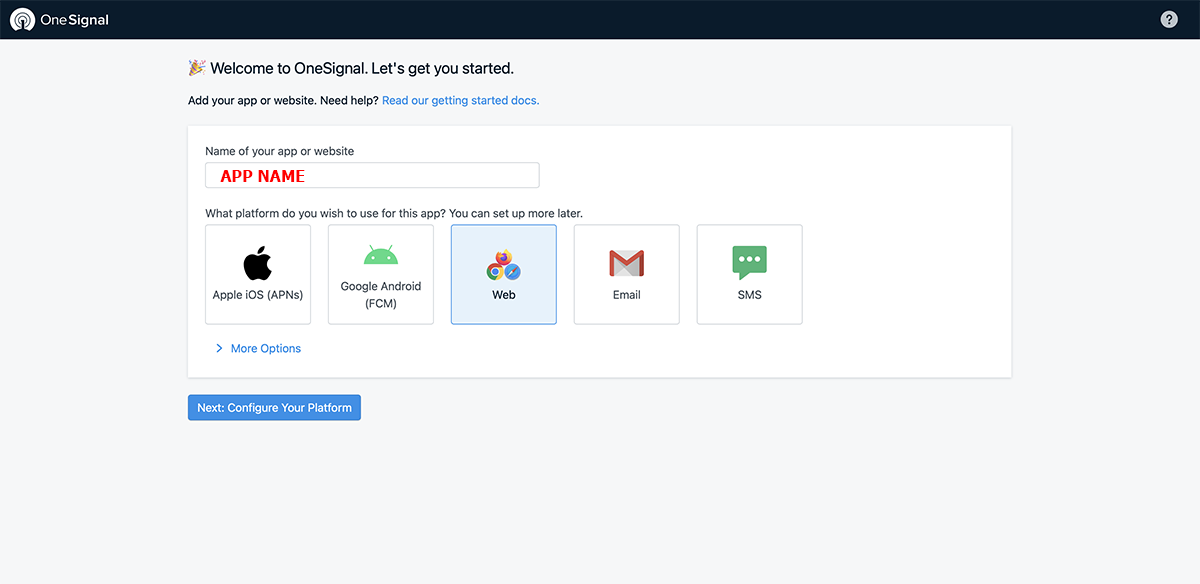
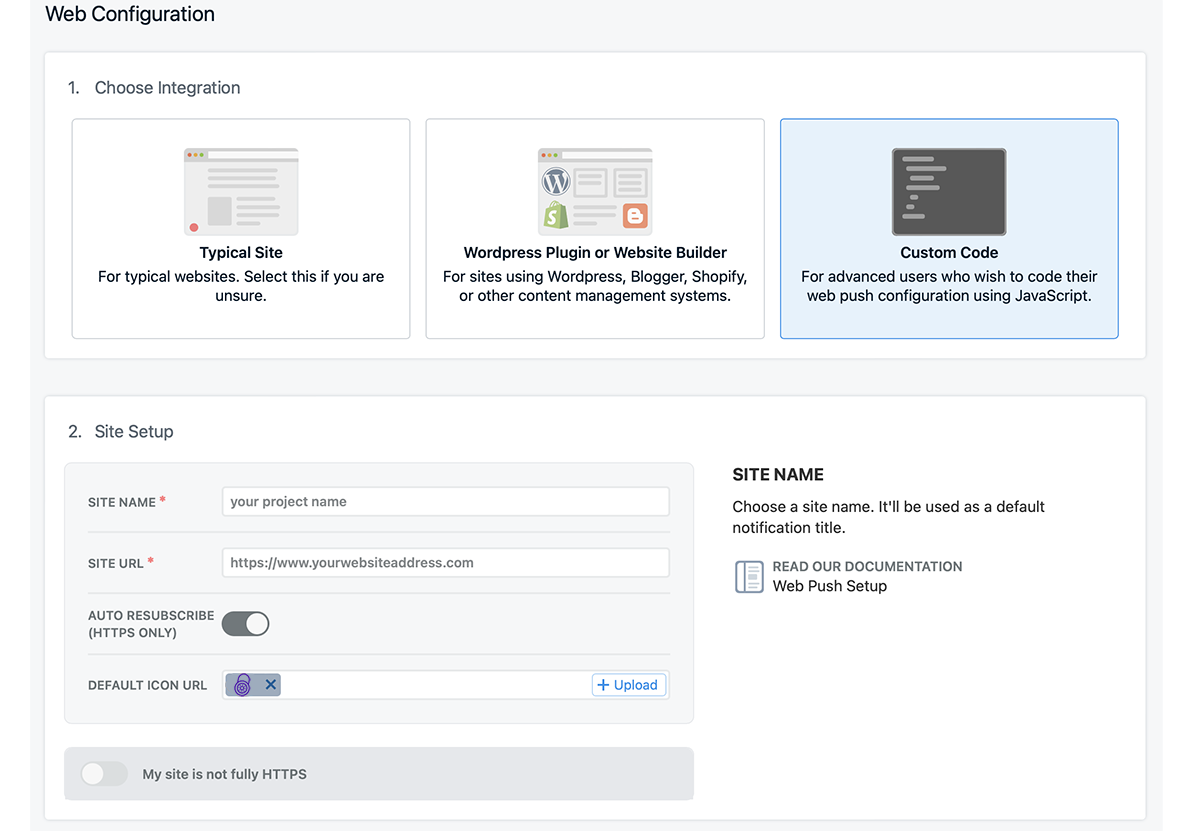
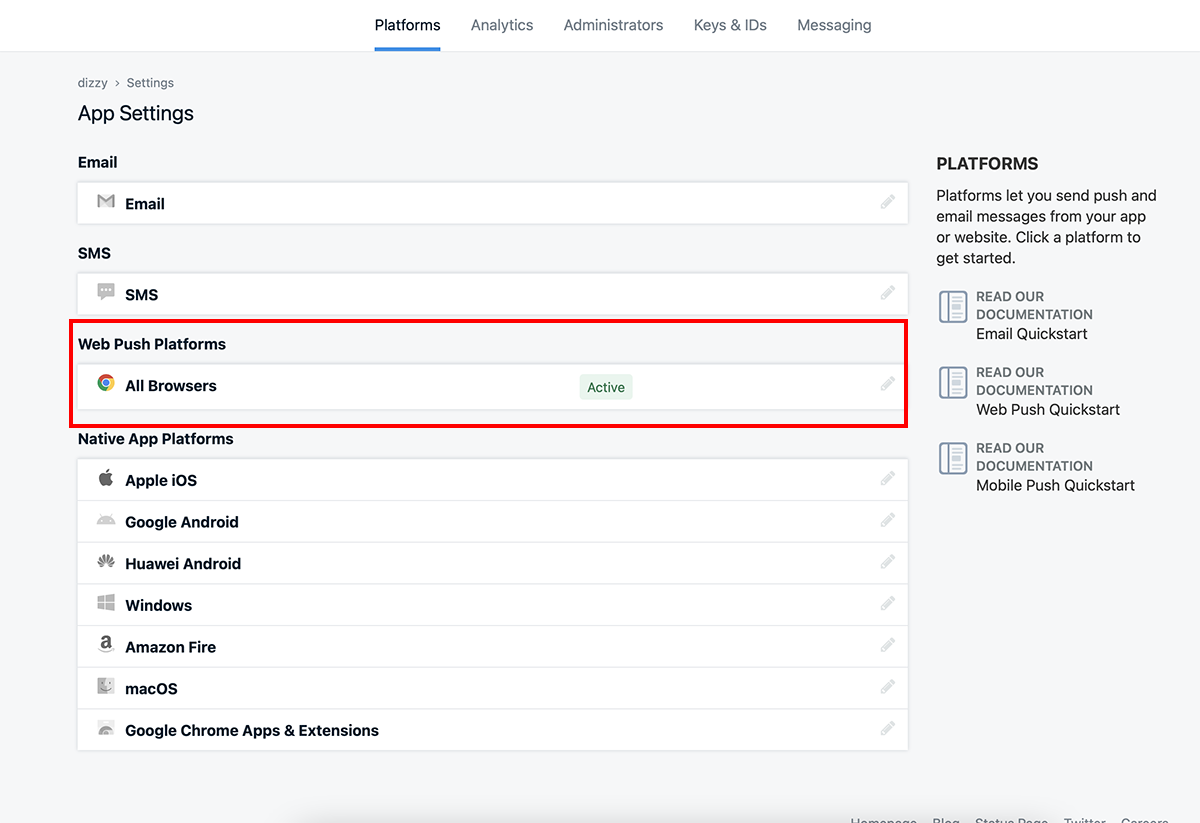
Push Notifications (OneSignal)
- Get yourself account Onesignal
- Step 1: Cick on New App/Website
- Step 2: Add OneSignal App Name, select What organization should it belong to? and select Set up your first channel: Web
- Step 3: Copy OneSignal App ID And click Add Key to create OneSignal Rest API Key
- Go to Panel Admin > Push Notifications enable and set the OneSignal App ID and OneSignal Rest API Key
 * Click on the image to see it larger
 * Click on the image to see it larger
 * Click on the image to see it larger
Customize
- Language files
- Find this lines in lang / en /
/*
|--------------------------------------------------------------------------
| Admin Language Lines
|--------------------------------------------------------------------------
|
*/

'admin'                     =>      'Panel Admin',
'role_admin'                =>      'Admin',
'dashboard'                 =>      'Dashboard',
How to add a new language
Translate Slogan, Description and Keywords (SEO)
<?php

return array(

/*
|--------------------------------------------------------------------------
| SEO Language Lines
|--------------------------------------------------------------------------
|
*/
"slogan" => "Support Creators Content", // New on v4.0
"description" => "Lorem ipsum dolor sit amet, consectetur adipiscing elit. Integer ut tortor rutrum massa efficitur tincidunt vel nec lacus. Curabitur porta aliquet diam, eu gravida neque lacinia.",
"keywords" => "donations,support,creators,sponzy,subscription,content",
);
IMPORTANT:
You will need to change in lang/es/seo.php if you want to use that language or if you have created another one.
Translate Categories
<?php

return array(

	/*
	|--------------------------------------------------------------------------
	| Categories Language Lines
	|--------------------------------------------------------------------------
	|
	*/
	"Animals" => "Animales",
	"Business" => "Negocios",
	"Charity" => "Caridad",
);Translate Shop Categories
<?php

return array(

/*
|--------------------------------------------------------------------------
| Shop Categories Language Lines
|--------------------------------------------------------------------------
|
*/
"exclusive-content" => "Contenido exclusivo",
"handmade" => "Hecho a mano",
"snapchat-sales" => "Ventas Snapchat",
);Path the files
resources > views > index > home.blade.php resources > views > index > home-login.blade.php resources > views > index > home-session.blade.php resources > views > index > creators.blade.php resources > views > users > profile.blade.php resources > views > users > edit_my_page.blade.php resources > views > includes > navbar.blade.php resources > views > includes > menu-mobile.blade.php resources > views > includes > footer.blade.php resources > views > includes > footer-tiny.blade.php Translate Pages
Sitemap
https://yoursite.com/sitemaps.xmlTroubleshooting
storage / framework and delete the file named down and file maintenance.php go back to Panel Admin > Maintenance mode put "off" and then "on" again, whenever you want to have your site in mode maintenance.Panel Admin > Email settings).htaccess file has not been corrupted when uploading to your server..env file has not been corrupted when uploading to your server. It must have a dot before the name, and you must have at least PHP 8.2https://yourwebsite.com/login/adminMake sure these folders and files have 0755 permissions
FilesHow to update
Upgrades folder, select the version you want, click on the README.html file and follow the steps.Sources and Credits
- Laravel - https://laravel.com/
- jQuery - https://jquery.com/
- Bootstrap - https://getbootstrap.com/
- Font Awesome - https://fontawesome.com
- jquery Form // malsup.com/jquery/form/
- jqueryTimeago.js // http://timeago.yarp.com/
- Fonts - https://www.google.com/fonts
- Tinymce - http://www.tinymce.com/
- Ckeditor - https://ckeditor.com/
Any problem or doubt send me an email to support@miguelvasquez.net
Do not forget to visit miguelvasquez.net
Thank you for purchasing my script 😉